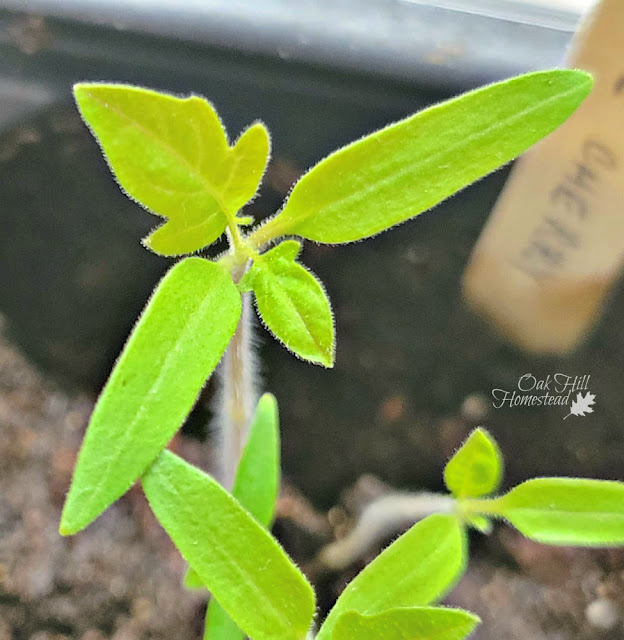
Seed starting can be intimidating for beginning gardeners. Do you have to start your seeds indoors? When should you start your seeds? Do you need grow lights?
You'll find all the information you need to start your vegetable seeds indoors in this post, including which seeds are the best candidates and which seeds should be planted directly in your garden instead..
The beginner's guide to starting vegetable seeds indoors
Here are my best tips for starting vegetable seeds indoors, including which seeds should and which shouldn't be started indoors.
Let's explore all the steps and secrets that will help you be successful at starting your own seeds.
This post may contain affiliate links, which means if you click on a link and make a purchase I might earn a small commission, but it doesn't affect the price you pay. Read my disclosure here for more info.
Do you have to start your vegetable seeds indoors?
Is it necessary to start vegetable seeds indoors? No.
But should you start your seeds indoors? Perhaps.
Here are a few reasons why you might want to start seeds indoors, then transplant them to the garden later on:
- If your growing season is short, starting seeds indoors will help you grow some long-season vegetables. Long season plants are those that require a long time to reach maturity and harvest. Starting these seeds early indoors can give you a jump on the season.
- If you have very hot summers, starting your cool season vegetable seeds indoors will allow them to reach harvest size before the weather is too hot. Cabbage, broccoli and cauliflower are good examples of this.
- Starting your own seeds is less expensive than buying transplants at the store or nursery center.
- The selection of vegetable seeds you can buy is much larger than the transplants available at the nursery or garden center.
What seeds are best to start indoors
Tomatoes, peppers, eggplant, lettuce, chard, spinach, broccoli, cabbage, cauliflower and other cole crops are pretty easy to transplant. Garlic, onions and shallots also transplant well. They are easy to start indoors.
Root vegetables such as carrots, beets and turnips don’t like to be transplanted. Doing so can damage the roots and result in deformed vegetables. You should plant these directly in the garden instead.
Beans, peas, squash, cucumbers, melons and corn can be started indoors and transplanted carefully, but they don’t really like to be moved. These plants can be direct sown in the garden, so there really isn’t much advantage to starting them indoors.
When to start vegetable seeds indoors
The date to start seeds indoors will depend on what you want to plant. You'll find this information on the back of the seed packet.
For example, some seeds should be planted 6-8 weeks before your last average frost date.
You can find your average frost date at Dave's Garden using your zip code. Once you know this date, you can count backwards the necessary number of weeks to find the right seed-starting date.
Seed-starting containers
You can buy seed starting trays or plant cells, or repurpose everyday items such as yogurt cups, homemade newspaper pots, toilet paper tubes and small plastic drinking cups.
Containers must be deep enough for the roots to grow. Drill or poke drainage holes in the bottom so water can drain through the soil easily.
These seed starting kits include plastic containers and humidity domes to go on top. Sprouting seeds love humidity!
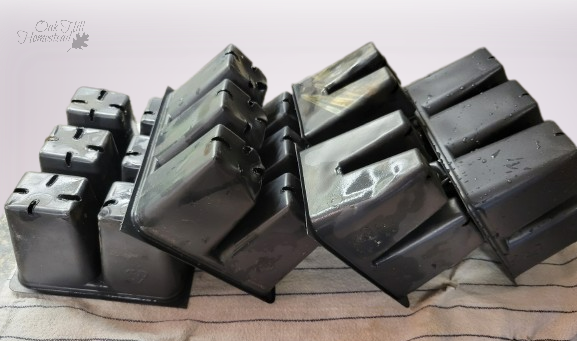
Plant pots and trays from last year can re-used if they have been disinfected.
How to disinfect your seed starting containers
If you are using new seed-starting containers, you can skip this step.
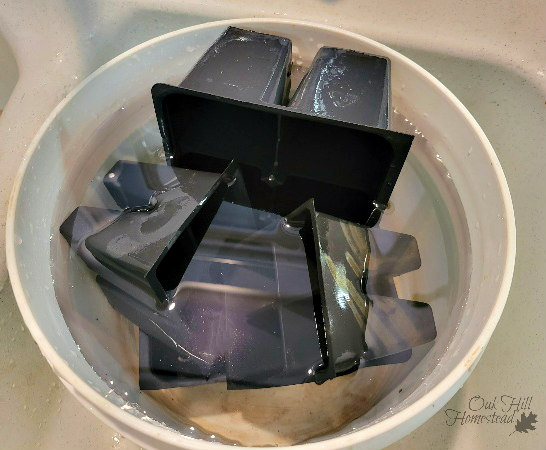
Before reusing containers, you should wash them well and disinfect them by soaking in a solution of 10% bleach and 90% water for 15 minutes.
Disinfecting your containers will help protect your seedlings from mold and damping off disease, the most common causes of seedling death.
Use a seed-starting mix, not garden soil
Soil from your garden or from pre-used containers can contain diseases that may prove fatal to your tiny, vulnerable seedlings. Instead, plant in a sterile seed starting mix to get your seedlings off to the best start.
.
Soil is also very dense, and it's hard for little seedlings to send their tiny roots through that dense mass. Seed-starting mix is light and fluffy, so your little plants will have a much easier time of developing roots and thriving.
I like this organic seed-starting mix with mycorrhizae.
Most seed-starting mixes are made with vermiculite, perlite and peat moss. They are soil-less, so mold, fungi and bacteria won't threaten your tiny seedlings.
Homemade seed-starting mix
You can also make your own seed-starting mix. Making your own means you know exactly what's in it, and it can also save you money.
Read more about making your own seed-starting mix here.
If you use homemade compost in your seed-starting mix, sift the compost through wire mesh to remove any large clumps and pieces of wood, bark and so on. Mix the ingredients well, so that your homemade seed-starting mix will be light and fluffy.
Where to buy your seeds
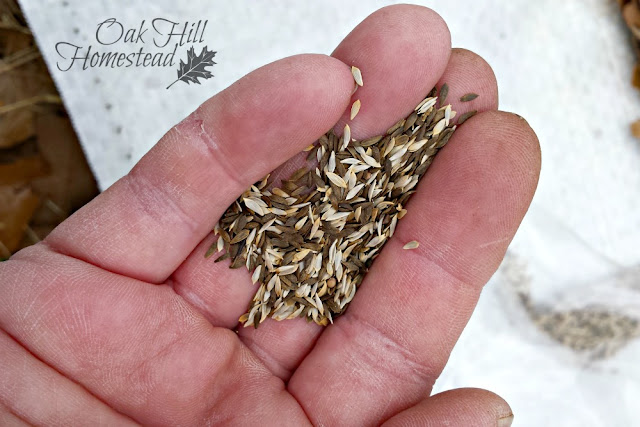
Vegetable seeds are available in spring in farm stores, garden shops and nurseries, home improvement centers and big box stores.
Shopping for seeds online will give you access to many more varieties, plus information on how to grow the seeds you purchase.
I buy my seeds from Mary's Heirloom Seeds. Mary sells only heirloom, non-GMO seeds and I'm extremely happy with the quality and germination rates of the seeds I've ordered.
Find out more about the differences between heirloom and hybrid seeds, as well as the benefits of planting open-pollinated heirloom seeds in this guest post by Mary herself.
Prepare your seed-starting mix
Before adding the seed-starting mix to your containers, pour it into a clean bucket, add a small amount of water and mix with your hands or a clean trowel. (Consider disinfecting your trowel before you use it with seeds, just like you disinfected your containers.)
You want the growing medium to be damp, but not soggy. Add the water a little at a time, adding more until the mixture is as damp as a wrung-out sponge.
Fill your containers with the damp seed-starting mix, leaving about half an inch of space at the top. Tap the container gently on the table to help remove air pockets.
Planting your seeds
Check the back of your seed packet for the recommended planting depth for each type of seed you are planting.
Poke holes in the soil-starting medium with a pencil or skewer. Add a couple of seeds, then pinch the soil back over the seeds. Press lightly so they'll have good contact with the soil.
Mist the soil lightly to get your seeds off to a great start.
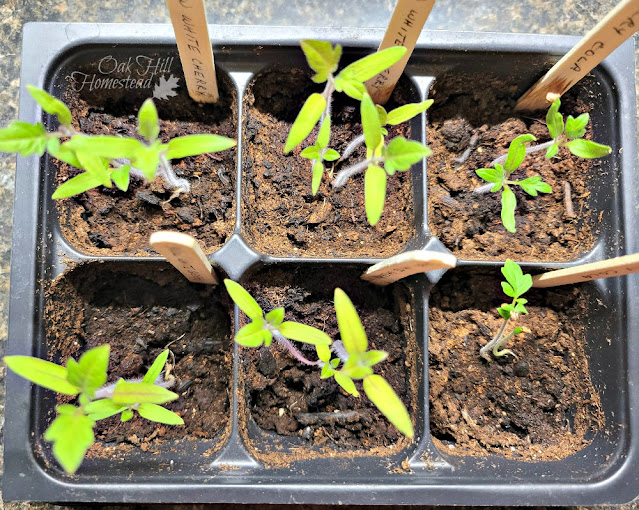
Label each container with the type of seed and the date you planted them. Don't kid yourself that you'll remember which container holds what, because believe me, you won't!
I know from experience that popsicle sticks with the plant names written on them with a Sharpie or ink pen will not last. The popsicle sticks soak up water when you water your seedlings and the writing is destroyed.
Cover your planted containers with a humidity dome, such as the one included with this seed-starting kit, or make your own by placing the containers inside a plastic bag and tie the end shut, or recycle a deli container tray with a clear lid.
Watering your seeds and seedlings
Keeping your seeds evenly watered is necessary for them to germinate well, but overwatering encourages mold and will kill your seeds and tiny plants.
Misting with a spray bottle is the safest way to water seeds and seedlings. Adjust the bottle to the finest spray possible, and moisten the surface of the soil. Check your seeds daily to check for germination and mist them if the top of the soil has dried out.
Keep your seeds warm so they'll sprout
Warmth is more important than light when you first start your seeds, so find the warmest spot in your home for your seed starting containers. The top of your refrigerator is a good spot for this first phase of seed-starting.
If your seed-starting location is a bit on the cool side you can purchase a seedling heat mat to use underneath the seed-starting trays.
You can use a heating pad instead of a seedling heat mat. Some sources suggest wrapping the heating pad with microwave-safe plastic. Just be sure to keep the heating pad completely dry.
That clear plastic dome or lid that you covered your containers with, or the plastic bag you put them inside, provides the humidity that sprouting seeds appreciate.
After your seeds sprout
Once your seeds have sprouted, remove the humidity dome or plastic bag. Too much humidity can cause mildew or fungal problems. Also remove the seedling heat mat or heating pad at this time, if you’ve used one.
While seeds don't need light at first, as soon as the sprouts appear they'll start reaching toward the light, so you'll need to move them to the brightest spot you can find.
From now on, water the containers from the bottom by adding water to the seed starting tray underneath, or setting the containers in a tray of water. Don't overwater, which can cause mold to form on the surface of the soil.
Is window light enough, or do you need grow lights?
When your seedlings have sprouted, your plants will need light in order to continue growing well. Find the lightest, brightest spot in your house for your plant nursery.
I have a plant-munching cat, so our extra bedroom is the best location because I can shut the door to keep the cat out of the room. Fortunately the window in this room faces southwest and is quite bright. I moved a card table in front of the window to hold my seed starting trays.
South-facing windows usually have the most light in the northern hemisphere. If you live in the southern hemisphere, you'll want to use a north-facing window instead.
Seedlings require a lot of light to keep them healthy and prevent them from becoming leggy. If you need more light, you can augment what you have with mirrors. Thrift stores and yard sales are great places to buy inexpensive mirrors.
Place a mirror behind the plants, so that the window is in front of the plants and the mirror is in back of the plants. The mirror will bounce the light around and illuminate the plants from both front and back.
Additional mirrors could be placed on either side, so that the plants are surrounded by mirrors on three sides with the window on the fourth side. Or cover sheets of cardboard with shiny aluminum foil if you don't have enough mirrors available.
To keep your seedlings strong, let a fan blow on them gently at low speed for a portion of each day. The fan simulates wind and will help your seedlings grow thicker, stronger stems.
Using grow lights
Seedlings need 14-16 hours of light per day. If you can't provide that much natural light, you can use grow lights.
Regular shop light fixtures with fluorescent bulbs will provide plenty of light, or you can buy grow light bulbs or adhesive grow light strips.
Start with the light source about two inches above the tops of your seedings. You'll need to raise the lights as the plants grow upward.
If the height of your light fixtures isn't adjustable, you can adjust the plants' height instead. When the plants are tiny, place the containers on top of a box or other item to bring them up closer to the lights. Then move the plants down as they grow taller instead of moving the lights higher.
You can learn more about building a grow light system in this post from The Self-Sufficient HomeAcre.
When to repot your seedlings
When your seedlings have grown their second set of true leaves, they should be moved from their seed-starting mix. This is usually around 10-14 days after sprouting.
Newly-sprouted seeds get their nutrients from the seed at first. As they grow, they will need more nutrients and more room to grow their roots.
You can repot them carefully into larger containers with potting soil, and begin fertilizing them with compost tea or diluted fish fertilizer.
NOTE - cats and dogs are attracted to the odor of fish fertilizer, so be sure your seedlings are in a safe location, whether you are using this inside or outside. I recommend fertilizing outdoors! (Ask me how I know that.)
When your seedlings are twice as tall as the containers they are in, or there are a lot of roots growing out of the drainage holes in the bottom of the pots, they’ll need to be repotted again into larger containers.
When to transplant your seedlings to the garden
The back of your seed packet will tell you the best time to move your seedlings in the garden, for example, two weeks before the last average frost date, or after all danger of frost has passed.
Before you transplant them, your little plants need to be “hardened off” - acclimated to the outside temperatures, wind and sunshine.
Before moving young plants from a warm, bright environment right to the garden where they are subject to direct sun, wind, rain and other weather extremes, help them to adjust gradually.
Over a period of a couple of weeks set your seedlings outdoors in a protected place, increasing the time they spend outdoors gradually. Bring them back inside at night and when you're expecting high winds, hail and other threatening weather.
Each day let them remain outdoors for a longer period of time, moving them from shade to sun until they are accustomed to the outdoors.
And finally, they are ready to be planted in their new home in your garden. May your new garden be abundantly blessed.
Need more resources?
Find seed-starting products in my Amazon shop.
If you'd like more information on starting a vegetable garden, here's how to build a raised bed garden and how to decide what you should plant.
Can you plant last year's seeds this year? Here's how to save extra seeds that you have left over this year for planting next year.
You can test the viability of your seeds with this easy seed germination test to do at home.
Here's where you'll find all of my gardening posts (including some growing guides for specific vegetables).


