Can you make compost when you live in the city? Can you have a compost pile if you have an HOA? Let's explore some alternatives to a traditional compost pile, and then I'll show you how to make a simple, inexpensive DIY compost bin.
How to compost when you live in town
So you're stuck in the suburbs - or in town, in the city, or under the restrictions of an HOA. You have a garden, but you want to start composting.
After all, composting isn't just for serious gardeners. It's eco-friendly, cost-efficient and so much more (which you can read about in this post, 4 Reasons You Should Be Composting.)
But how can you start and maintain a compost pile in town, where "looks are everything," and perhaps without a lot of space for a sprawling, untidy pile of decomposing matter?
Can you have a compost pile in the city? Yes, you can!
Composting solutions
There are several solutions to the problem of making compost in the city, in town, or with an HOA.
For instance, you can purchase a compost tumbler, a compost enclosure or a compost bin. Or you can make your own compost bin. You'll find directions for a DIY composting bin further down in this post.
This post may contain affiliate links, which means if you click on a link and make a purchase I might earn a small commission, but it doesn't affect the price you pay. Read my disclosure here for more info.
Compost tumblers
Most compost tumblers are anaerobic systems that make compost using an airless process.
To use a compost tumbler, you add compost ingredients to the hopper and turn the handle to mix up the materials. You'll find more information on using a compost tumbler here.
With the right ratio of green and brown ingredients and frequent turning, you could supposedly make compost successfully in a tumbler in about three weeks [source].
Compost bins and enclosures
Compost bins are often made of recycled plastic. They are aerobic systems which allow air into the compost ingredients, unlike the closed compost tumblers. Basically, these structures keep the compost contained in a pleasing manner.
With any of these compost bins you'll still need to turn the compost if you want to speed up the process, and you're limited by the size of the container.

This wooden compost enclosure above looks very nice. It's similar to the bin system you can make using wooden pallets, but prettier if you have neighbors or an HOA breathing down your neck.
My preferred method of composting is to simply pile up the materials on the ground and turn it weekly. Topping it with a layer of straw or wood shavings or grass clippings helps to keep it a little more organized and not so scary-looking
Plus it's free, since there is no enclosure to build or buy. And it's super-easy to shovel the working compost from one spot to another each week to hurry up the decomposition process.
But what if you live in town and can't have a pile of decomposing matter in your yard for all the neighbors to complain about?
Trash Can Composting
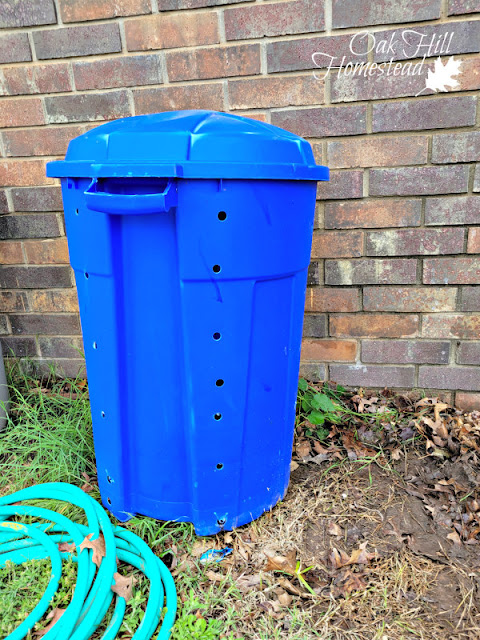
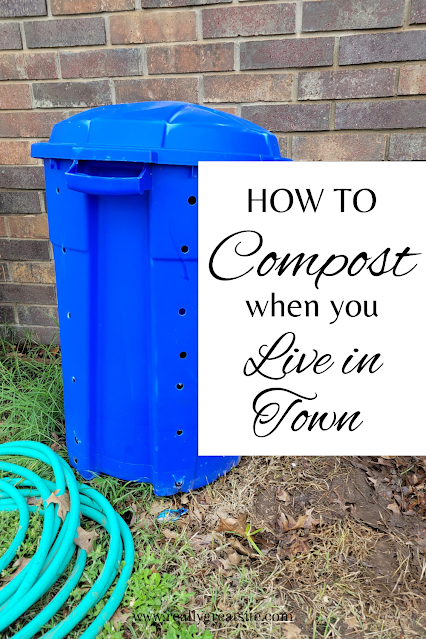
Composting in a trash can is one solution. It's simple, easy and it's relatively inexpensive too.
Your "compost enclosure" is a plastic trash can from your local home improvement store.
Choose a round, 32-gallon plastic trash can with a lid. Wheels aren't necessary, but you can buy a wheeled trash can if you prefer.
My local home improvement store has these for $25, as well as others that are more expensive.
It's also recommended that you buy a piece of PVC pipe about 3.5" in diameter to go in the middle of the trash can, which we did. If all you can find is 3" pipe, or 4" pipe, that's fine. The size isn't critical.
However, as the user of this compost system, I think the pipe is kind of difficult to use when you're first filling up the can. I admit I got frustrated and removed it, although after starting a few more cans of compost, I've added it back in.
I believe that if you are going to fill up the can and leave it to decompose on its own, the pipe would be very useful, but I'm pretty "hands-on" with my compost.
I'm regularly turning my compost, mixing it, moving it from one trash can to another, and so on, so my compost gets enough air naturally. (Hey, I don't need a gym membership!)
So you can choose whether you need the pipe or not.
How to build your trash can compost system
This DIY trash can compost bin is simple and easy to make.
The first step is to drill holes in the trash can - lots of holes. The Chief drilled one-inch holes on the bottom and all over the outside.
Now that I've used mine for awhile, I recommend making lots more holes. I'm going to ask the Chief to drill more in ours. (Update: he did!)
Then measure the inside of the trash can in the middle, where the PVC pipe would stand upright. Cut the PVC pipe to this length.
Next, drill more holes in the pipe. The pipe will act as a chimney, allowing air into the middle of your compost bin. Be sure there is a hole (or several) in the center of the bottom of the trash can too, under the pipe.
By the way, if you don't have a cordless or electric drill, you can use a soldering iron to poke holes in the trash can or any other plastic container.
And if you can't drill or burn holes in a piece of PVC pipe, I noticed that Home Depot carries perforated pipe. These are at least 12-feet in length and maybe longer, for less than $20.
Now that you have holes - lots of holes - in your trash can and PVC pipe, your trash can compost system is ready to use!
Getting started - using your compost system
You'll build your compost pile inside this trash can, with the PVC pipe in the middle. It's a little tricky getting the pipe to stand up when you're first adding materials, but it doesn't have to be exactly straight or exactly in the middle either.
Just do the best you can. Eventually it will be held in place by the volume of your compost materials.
Start with a layer of sticks and branches if possible. Not long ones, and not a large number of them, just enough to roughly cover the bottom of the trash can. This will allow some air flow underneath your compost.
Add a layer of "brown" compost ingredients - straw, autumn leaves, shredded paper, torn-up cardboard or whatever you have on hand. This will help to soak up the moisture that will inevitably drip through the trash can.
Some of that moisture will drip out the holes in the bottom of the composter, and that's perfectly normal. In fact, the ground under my compost pile is always some of the best soil in my yard and garden. The benefits of my compost pile even go underground!
However, you might want to be mindful of where you locate your trash can composter. You don't want to stain concrete or anything. You probably won't want to keep it inside the garage because of this tendency to drip, either.
So setting your composting trash can on dirt or grass is a grand idea, or perhaps you have a plastic or metal tray to set it on.
Remember that you aren't adding material inside the PVC pipe, just around it. The pipe should be [relatively] empty inside. Don't stress over it though. Dirt happens.
Next, layer your compost ingredients just as you would in an on-the-ground pile: greens, then browns, then greens, etc.
You can add a lot at a time or just add a little each day. Be sure to cover kitchen waste with "brown" ingredients to keep down flies, odors, and so on. Or dig a hole in your compost and bury the fresh scraps.
The more you add, the easier it will be to keep the PVC pipe upright inside the trash can.
Set the lid on top of your trash can composter. Don't lock it down, just set it on top to allow some airflow. It helps keep out excess moisture (rain).
What to add to your composter
Some great additions to your trash can compost bin are...
"Brown" items (which contain carbon) such as:
- Wood chips, shavings, sawdust
- Dried autumn leaves
- Straw (not hay which has seeds in it)
- Shredded paper or newspaper
- Cardboard torn into small pieces
"Green" matter (which contain nitrogen) such as:
- Weeds pulled from the garden (without seeds)
- Grass clippings from mowing the lawn
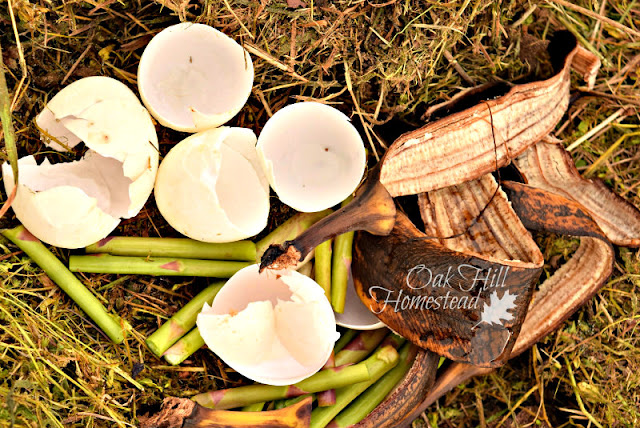
- Kitchen waste such as vegetable peelings, past-its-prime veggies and fruit, eggshells and so on
- Coffee grounds
Use thin layers of shredded paper and grass clippings as they tend to form a mat that doesn't break down easily. And although shredded paper is a "brown" and grass clippings are "green", I don't layer the two of them together because they really form a matted mess together!
Basically, you want to use small pieces (so cut up that giant zucchini that went bad in the fridge!) and thin layers to get the fastest compost action.
You can buy compost activators, or you can add some comfrey leaves throughout the layers in your compost pile and get things "working" faster. (Comfrey is an amazing plant that is so good for your garden and for you! You can read more about comfrey here.)
Chicken manure - and other manures from herbivores such as cows, horses, goats and rabbits - is an excellent compost material, but it might not be available to you in town. Do not use manure from dogs, cats or pigs.
How long does compost take to break down?
There are many factors that affect the speed of composting.
The outside temperature, whether your composter is in the sun or the shade, the time of year, and the ratio of carbon and nitrogen-containing ingredients you've used will all affect the speed of your compost endeavors.
How often - and IF - you turn your compost is another factor. (Compost tumblers turn the pile for you, which is why it is a faster process.)
The commonly-accepted answer is that compost will break down within four weeks to one year's time [source].
How to speed up the composting process
These tips will help you make compost faster. Some of these tips, such as having the proper ratio of greens and browns, will take some experience to accomplish, but others are quick and easy to implement.
- Start with a layer of branches and twigs on the bottom to add some air space.
- The proper ratio of brown materials to green materials is important, but it will take some experience to "know what's right." If your compost is too wet or smelly, add more browns. If it's too dry, add more greens
- The proper level of moisture is also important and is related to the tip above. A dry pile won't work as quickly as a properly-moist one will. Pick up a handful of compost and squeeze it. It should have the texture of a wrung-out sponge.
- Use the smallest materials you can. Shred leaves and paper. Chop up kitchen waste into small pieces. Crush eggshells.
- Use thin layers. Grass clippings and shredded paper in particular tend to mat together and present a larger surface area, which takes longer to decompose. Spread them in multiple thin layers instead of one thick layer, or mix them well with other materials.
- Make a larger pile. Of course, when you're using a trash can composter you are limited by the size of the container, but you'll see the difference when you first begin adding materials to your composter compared to when it's half full or nearly full.
- Add some sticks and twigs (sparingly) to your compost. While they won't break down very quickly - in fact, you'll probably have to add them to your next "batch" of compost - they trap air space inside your composter. Cardboard is another helpful ingredient for this purpose. (I know, I said to use small pieces, but a few larger items are helpful. Just know that they won't break down completely in one composting cycle.)
- Add a compost activator. While you can purchase various activators, you can also simply add some comfrey leaves throughout your compost.
- A handful of soil or finished compost is another good compost activator. Soil and compost are both full of the bacteria needed to get your new compost started.
- Turn your compost. Yes, even though you are composting in a trash can, it will benefit from being turned occasionally. I dump the trash can out onto the ground and shovel it all back in every couple of weeks. This adds oxygen to the mix which helps your compost decompose.
How do you know your compost is ready to use?
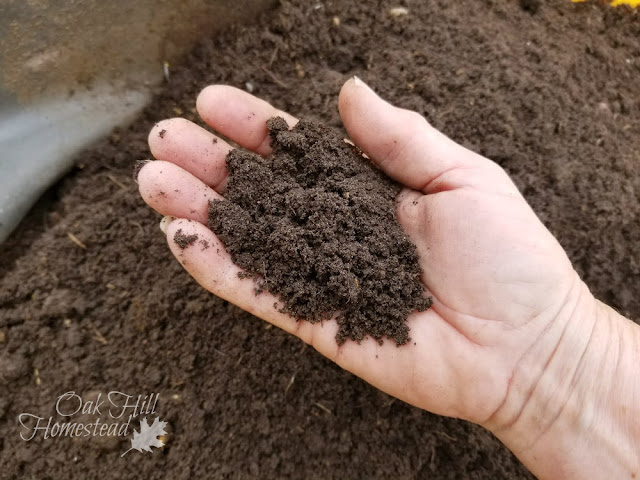
Compost is ready to be used when it looks like rich, dark brown soil, is crumbly, and when it smells earthy.
There should be no recognizable ingredients, although you can remove sticks and twigs and such and put them back in the trash can composter with your next load of compost ingredients.
Finished compost, which is called humus, benefits from a period of "mellowing" before being used in the garden - left alone to cool down and "finish."
During this time you could add some red wiggler worms to add castings and work their composting magic. Hot compost piles are too hot for worms, but they love working on cooler, finished compost.
Many composting gardeners have more than one compost pile or bin going at a time. Three seems to be the most common number:
- A "working pile" where you're adding kitchen waste and other ingredients
- A second pile that is full and is undergoing the final composting process
- A third pile that is finished and ready to use in the garden
You too could have several trash can composting bins in your backyard. They're inexpensive, easy to make, and hide your composting efforts from neighbors and your HOA.
For more information on composting
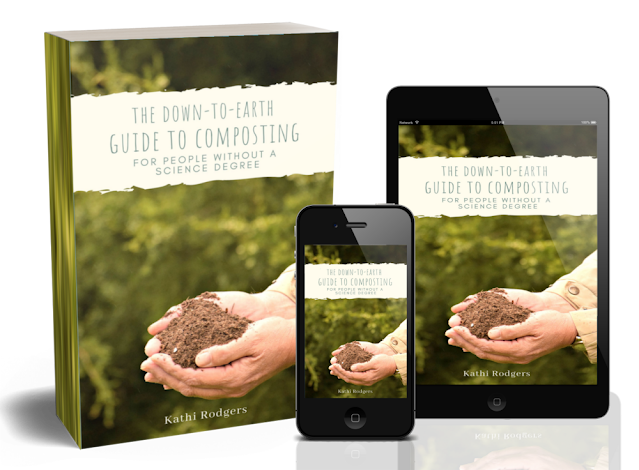
Are you ready to learn more about composting and get started on a program of your own? Find out how in my new ebook The Down-to-Earth Guide to Composting.
I'll show you in plain, simple terms how to start your compost pile, demystify that "magic ratio" of greens to browns that everyone talks about, help you troubleshoot your compost pile if needed, and give you a crazy-long list of what you can and what you shouldn't compost.
You'll find more information here.
For more gardening and simple living posts like this, subscribe to my weekly-ish newsletter The Acorn, and join me on Facebook, Instagram and Pinterest. I'd love to see you there!
~~~~~
Facebook | Pinterest | Instagram | Subscribe




.jpg)


