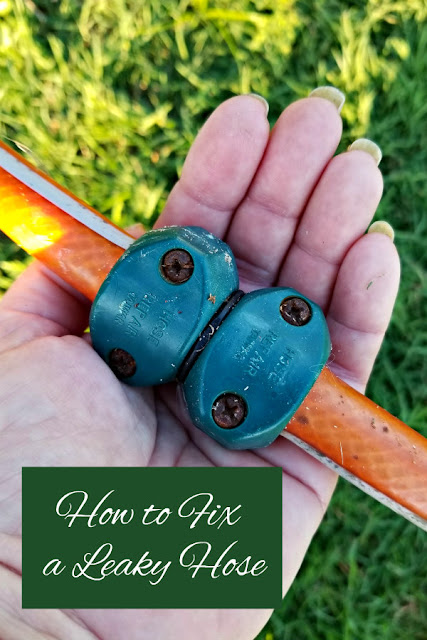
A leaky garden hose is frustrating to a gardener or homesteader, and wasted water is also wasted money. Fixing a water hose is easy, and much cheaper than buying a new hose. Here's how to fix a hole in a garden hose.
How to fix a hole in a hose
Holey doesn't even begin to describe my soaker hose. I mean, it's supposed to be full of tiny holes so the water can slowly leak out and water the garden, but my soaker hose is a bit holey-er than that.
I didn't use my soaker hose last year; when I pulled it out of the shed last spring I realized it had a huge gash in it. So it sat coiled up in a corner of the garden for a year until this spring, when I decided I'd repair it.
When I uncoiled it, I realized that instead of one spot in need of repair, the hose was in three separate pieces. Hmm.
I wondered if an animal had chewed on it, or if it had rotted. But I fixed it anyway, and it's working, at least for now.
I'll probably have to buy one next year but it was worth spending money on repair parts so I could get another year's use out of it.
Besides, those repair parts can be used on other hoses in the future.
We always have some garden hose repair kits on hand because we need them often, and we never throw away repair parts even if a hose is too far gone to keep. Off come the parts to be re-used on another hose someday.
Having a supply of extra washers is another good idea. Washers dry out with age and are easily replaced if you have some on hand.
Types of garden hose repair kits
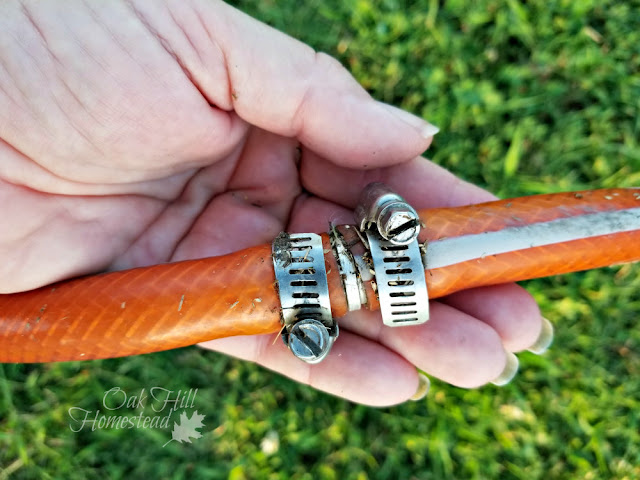
There are several types of garden hose repair kits that you can buy. One has a metal piece that goes inside the hose and metal hose clamps to tighten it all up, like the one in the above photo.
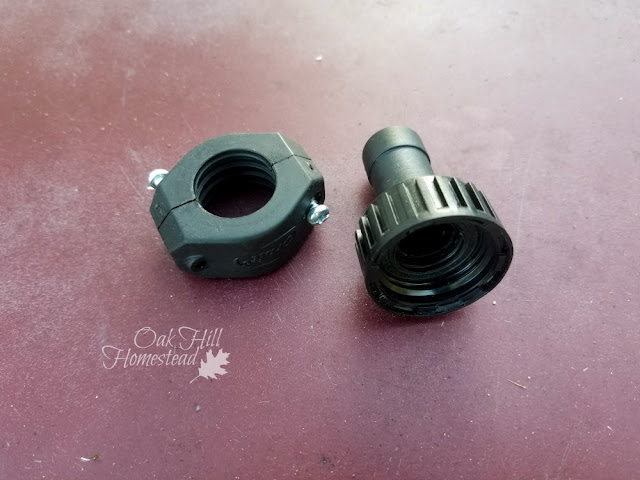
Another type, like the one above, is plastic with clamps that tighten with screws. This is the type I'm using to fix my leaky soaker hose.
There is also a third type of hose repair kit; it looks like this plastic one but has metal pieces instead of plastic.
All three types of garden hose repair kits work the same way, and these instructions apply to either kind of kit.
Umm, yes, those two pictures are of the same garden hose. It's been repaired in two places.
Buying a water hose repair kit
Before you head to the hardware store, figure out what size hose repair kit you need.
I had some repair kits on hand but after struggling for awhile I realized I was trying to use a repair piece that was bigger than the hose it was supposed to go in. I needed a half-inch water hose repair kit instead of the 3/4" parts I had on hand.
Measure the inside diameter of your hose to determine the correct size fittings you'll need.
Finding the right size part was easier said than done. Most of our local stores only carry the 3/4" size.
There is also a smaller 3/8" size. Be sure to measure your hose so you get the right size repair kit for our needs.
If you'd like to save yourself a lot of running around looking for the right size, I'll include some links to Amazon's hose repair items in the half-inch size a little further down in this post.
Using a soaker hose in a raised garden bed
I use raised beds (you can learn how to build a simple raised bed here). My original soaker hose was long enough to water two beds, with a long area of hose that watered the grass in between the two beds.
Of course there's no reason to be watering the grass in between the two raised beds; it's wasted water. Plus I have to mow the grass more often because it's being watered!
So instead of repairing my hose so that it would be one long hose as it had been originally, I decided to turn the long piece into a soaker hose for the tomato bed, and combine the two shorter pieces into a second hose for another of my raised beds.
This took a few more parts than just fixing a hole in a hose, but it gave me two perfect-length soaker hoses to use in two raised beds.
If all you need to do is fix a hole in your garden hose, scroll on down to find out the parts you'll need and how to make the repair on your hose.
How to turn one long hose into two shorter hoses
Here's what I needed to turn my long soaker hose, which was in three pieces, into two shorter hoses.
The longest piece of my hose had the original fitting on one end that screws onto the faucet, which is called a female end. The other end of this piece of soaker hose was the broken end, so it didn't have a fitting. I need to purchase a male hose fitting for that end of the hose.
That would complete the repair of this longer piece of hose.
One of the two shorter pieces of hose had been in the middle of the original hose, so it had no fittings on either end.
The third piece of hose had a smaller fitting - called a male end - and also had a cap that closed off the end of the hose, kind of like a screw-on lid on a pop bottle.
To connect these two shorter pieces into one usable hose, I had to purchase a female hose fitting for one end, and a hose repair kit to join the two pieces of hose together in the middle.
So here's what I needed to buy for my soaker hose repair.
- 1/2" male end plus an end cap to keep the water from flowing out the end
- 1/2" female end
- 1/2" coupler to join two pieces of hose together (commonly just called a hose repair kit)
That would give me two shorter soaker hoses, both with a female end and a male end with an end cap.
One hose would also have a repair in the middle, where I joined the two shorter pieces of hose together.
Purchasing the hose repair parts
Amazon carries a package with both the male and female hose repair ends included; they also offer packages with multiple pieces, not a bad thing to have on hand in my opinion.
This link will take you to Amazon's 3/8" hose repair items if that's the size you need, and this one to their 3/4" hose repair items.
In order to buy the end cap, I had to buy a package with the cap, a filter and several hose washers. If you're fixing a garden hose (not a soaker hose), you won't need to purchase an end cap. Soaker hoses are supposed to have this "stopper" at the end so water won't flow out the end of the hose, but will ooze out of the small holes in the body of the soaker hose.
Be sure to check the size of any item you want to order; even if you search for a particular size sometimes they end up in the wrong section in Amazon's search system, so read the description of each fitting before you add it to your cart.
Double check if you're buying the parts at the hardware store too. Just because a part is in the box labeled 3/4" doesn't mean it's really a 3/4" part. They seem to be mixed up in the boxes rather often.
Are you ready to repair that leaky hose?
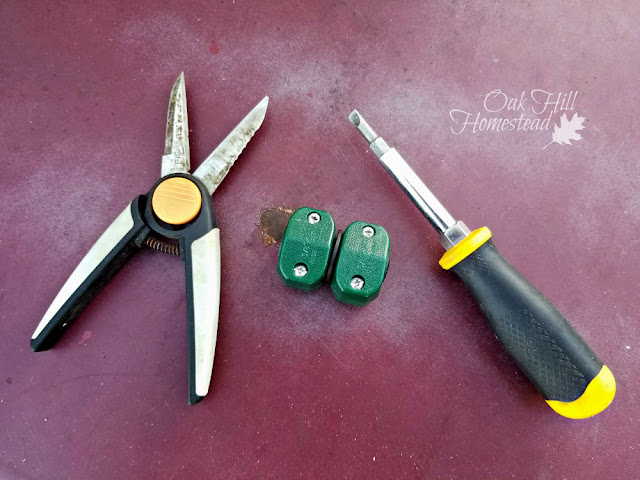
Here's what you'll need to fix your garden hose or soaker hose:
- hose repair pieces
- screwdriver (the kit I used allowed me to use either a flat or Phillips head screwdriver)
- scissors or sharp knife or pruning shears to cut the hose to get a clean edge
How to join two pieces of hose together
If your hose just has a hole in the middle, you'll be joining two pieces together and will need a coupler, which is often simply called a hose repair kit.
Start by cutting the hose into two pieces, removing the little slice with the hole in it. The cuts should be straight and clean, not jagged.
Use the screwdriver to loosen the screws that hold the clamp closed.
You don't need to remove the screws completely; just open the clamp enough so you can slip it over the cut end of the hose easily.
Put one clamp piece onto one piece of the hose. Don't tighten it yet, just let it "hang out" on the hose.
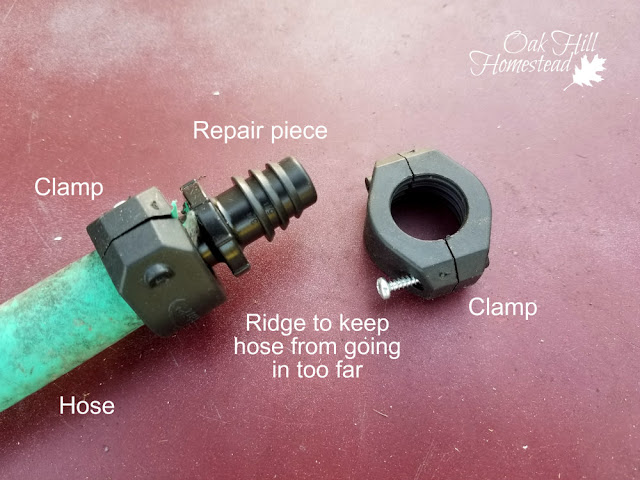
Insert the repair piece - the part that looks like a plastic pipe - inside the cut end of the hose.
If you have trouble doing this, you can put the end of the hose in a jar of hot water until it softens up a bit, or let it sit in the sun on a hot day for awhile before you start.
Just wiggle the repair piece in there. Get it as far on the repair piece as you can. There's a ridge in the middle to stop the hose from going too far.
Now, move the clamp piece up (that you previously put on the hose to "hang out" until you needed it) over the repair piece inside the end of the hose.
Use the screwdriver to tighten the screws on the clamp. You can alternate working on the screws: tighten this one a bit, then tighten the other one a bit, then back to the first one again.
Viola! You're half-done! Now repeat the steps on the other piece of hose, remembering to put the clamp on the hose first and let it "hang out" while you fit the two hose pieces together with the repair piece inside both hose pieces.
Then slide the second clamp on top of the repair piece with the end of the hose inside and tighten the screws like you did on the first side.
To put a new end fitting on a hose
If you are putting a new fitting on a hose end, either male or female, the process is similar. Put the clamp on the hose first and let it "hang out" while you insert the end of the fitting inside the hose, then move the clamp on top and tighten.
See, it wasn't that hard, was it?
For more self-sufficient and DIY posts like this, subscribe to The Acorn, my weekly-ish newsletter, and join me on Facebook, Pinterest and Instagram. I'd love to see you there!
Related Posts:
Watering the Summer Garden
How to Make Comfrey Tea for the garden
~~~~~
Facebook | Pinterest | Instagram | Subscribe


