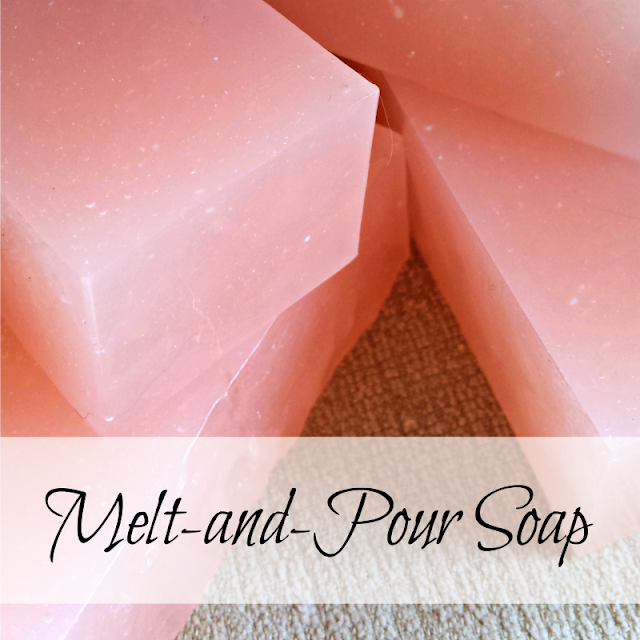
Do you want to make your own soap, but are afraid of using sodium hydroxide (lye)?
It is possible, sort of. Instead of mixing liquid and lye with oils, you can buy ready-made soap base that you then "melt and pour" to make your own soap.
This post contains affiliate links. Read my full disclosure here.
I've always made cold-processed and hot-processed goat milk soap, with cold-processed being my favorite. Both of these methods use sodium hydroxide to turn liquid (water or, in my case, goat milk) and oils into soap through a chemical process known as saponification.
Sodium hydroxide, commonly known as lye, is a dangerous material and must be used with great care. It's not something that I would allow a child to use, ever! However, you can buy one-pound blocks of glycerin base, or melt-and-pour soap base. This is already soap; you simply melt it, add color, fragrance, or whatever you like, and pour into molds to harden.
A one-pound block of glycerin soap base.
I hauled the box out from its storage place and put Granddaughter in charge of our projects. She chose the fragrances she liked as well as the colorants. We were limited to the neon soap colorants in the box (and some of them had dried up) plus my containers of brick red oxide, titanium dioxide that turns soap white, and a tiny bottle of blue LabColor.
Since the soap base we were using was transparent, the titanium dioxide came in handy; it would make the finished soap opaque.
My silicon loaf mold with bars of cold-processed goat milk soap.
(I'll add links to all the equipment and supplies we used down at the bottom.)We used both of my silicon loaf molds. Inspired by the fragrance oils, Granddaughter decided to make strawberry soap and watermelon soap. Each of the molds made six bars of soap and used one pound of glycerin base.
To make melt-and-pour soap, you just cut up the one-pound block of glycerin soap base into small pieces, put them in a microwave-safe bowl (we used a glass measuring cup) and melt it in short bursts of time in the microwave until it is liquid. Add color and fragrance oils and pour into your mold.
We made the strawberry soap by combining some neon pink colorant with some red oxide powder and a little titanium dioxide (white) to make pink. Only a child could do this, right? She ended up with a very pretty soft pink color. We added enough strawberry fragrance until Granddaughter was satisfied with the scent. I poured it into the silicon mold, and she added some poppy seeds to resemble strawberry seeds. We set that mold aside and started on the watermelon soap.
We split up the next one-pound block of glycerin base into three piles: one for the "rind," one for the "white part" and the third one for the "inside" of the watermelon. The piles weren't equal, the pink section had the largest share of the base pieces, and the white layer had the least.
Not having any green coloring, Granddaughter mixed the blue LabColor liquid with some neon yellow liquid colorant until she was happy with the color. She melted the pile of soap pieces for the "rind" until it was liquid, and added the green color she'd made. We poured this into the loaf mold first, forming a layer on the bottom.
The third layer was a brighter, darker pink than the strawberry soap, made with the same color ingredients but less white, and we added the watermelon fragrance oil to this layer. I sprayed the top of the white layer with alcohol and poured in the pink layer. Granddaughter again added some poppy seeds to resemble watermelon seeds.
We read that you can unmold the soap after a few hours but it might still be a little soft, so we waited a full 24 hours before we removed the loaves of soap from the molds. I used my miter box and knife to cut the loaves into bars. The watermelon soap is really cute!
If you want to make soap without using lye, or if you want to share this craft with your children or grandchildren, you might want to try making melt-and-pour soap. You can buy your supplies at Amazon or at online soap suppliers such as Brambleberry.
I bet it won't be long after you try this that you'll be making soap from scratch!
Here are the supplies we used from Amazon.com:
Glycerin soap base, clear - it also comes in goat milk, shea butter and others
Silicon loaf soap mold
Miter box - the easiest way to cut your soap bars!
Soap cutter
From Brambleberry's website:
Blue Lab Color
Brick Red Oxide pigment
Neon soap colorant
Titanium Dioxide
Watermelon fragrance oil
Strawberry fragrance oil
You might also enjoy:
Soapmaking Series posts
~~~~~
My hope is to inspire you, and to encourage your homesteading plans and your dreams of a simple, self-reliant, God-dependent life. You can follow me at:
Facebook | Pinterest | Subscribe


